
PLAN FOR SUCCESS
(See figure 1.) Note: Each seat base has two side rails – these are the sides of the seat box, while the non-railed sides are the front and back
2. Open all back, arm, and corner back boxes.
3. Insert your J-Brackets™ into the white markers on all backs, arms, and corner backs so that they’re ready to be dropped in when you get to their steps. (See figure 2.)


onto the seat base.
Continue below to choose the build you are looking to assemble!
Chair
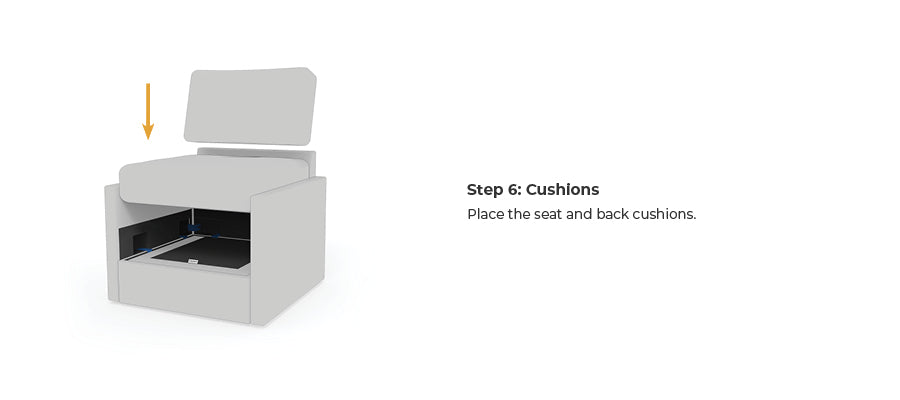
build out for chair

Step 3: Arms
Attach C-Clips to the white discs on the sides of the seat base with the rails. Line up the holes of the C-Clip and white disc and fasten securely with a thumbscrew. Place J-Brackets™ into the white indicators in the arms and slide the arms into the sides of the seat base. Align the front of the arm with the front of the seat base so that they’re even.
Note: The arm has a slit in the fabric on the bottom to allow the C-Clip to hold it.

Step 4: Secure the Arms
Attach the C-Clip to the white discs in each corner to connect the back to the arm. Line up the holes of the C-Clip and white disc and fasten securely with a thumbscrew.

Step 5: Blue Steel Spring™ Suspension
Set the suspension into the seat base. The “Front” tag should be facing the front of the chair.

Loveseat or Sofa
Build out for loveseat or sofa


Step 5: Secure the Arms
Attach the C-Clips to the white discs in each corner to connect the back to the arm. Line up the holes of the C-Clip and white disc and fasten securely with a thumbscrew.

Step 6: Blue Steel Spring™ Suspension
Set the suspension into each seat base. The “Front” tags should be facing the front of the sofa or loveseat.


Sectional
Build out for a Sectional

Prepare your layout by setting the seat boxes where you want your sectional placed. All of the rails on the seat boxes should be on the sides, and the non-railed sides should be facing front/back.


Step 2: Backs
Insert J-Brackets™ into the white indicators on the backs. Then, slide the backs with the J-Brackets™ onto the seat bases.

Step 3A: Corner Back
Insert the J-Brackets™ into the white indicators on the corner back and drop the corner back into the corner seat base.

Step 3B: Securing the Corner Back
Secure the corner back by using a C-Clip for the side-to-side connection.

Step 4A: Arms
Add C-Clips to the far sides of the sectional seat bases that have rails. Place J-Brackets™ into the white indicators in the arms and slide the arms into the ends of the seat bases. Make sure the front of the arm is even with the front of the seat base.
Note: The arm has a slit in the fabric on the bottom to allow the C-Clip to hold it.

4B: Secure the Arms
Attach the C-Clips to the white discs in each corner to connect the back to the arms. Line up the holes of the C-Clip and white disc and fasten securely with a thumbscrew.

Step 5: Blue Steel Spring™ Suspension
Set the suspension into each seat box. The “Front” tag should be facing the front of the sectional seats.


check out our idea starters
Now that you see how Flex goes together, see what you can really create with it. These ideas will just get you started!